on
Writing Win32 apps like it's 2020: A DPI-aware resizable wizard
This is the third part of a three-part series on Win32 development:
- Introduction
- Helpers for a modern C++ world
- A DPI-aware resizable wizard
User interfaces in 2020 need to consider many more details than those of previous generations.
One of the biggest changes of the last decade is certainly the introduction of HiDPI displays, displays with much higher resolutions together with software using more pixels per GUI element.
Win32 with its pixel-based approach on user interface design may look totally inappropriate here, and many examples of blurry Win32 applications on high-resolution displays seem to confirm that.
However, that appearance is deceiving and this article will show you why.
A dive into history
Back in the days of Windows 95 to XP, things were still easy: The operating system used a default setting of “96 DPI” (dots-per-inch) for all GUI elements, meaning that a 12-point font was rendered on screen by allotting
12 pt · 1 inch/72 pt · 96 pixels/inch = 16 pixels
for its height.
As all computer monitors of that time had roughly the same pixel size (between 250 and 300 µm), there was hardly a need to ever deviate from this default.
While Windows already came with an additional “120 DPI” option and also allowed for a custom DPI setting, any non-default value was clearly a second-class citizen.
Just look at the following screenshots of Windows XP scaled at 100% (96 DPI) and 200%:
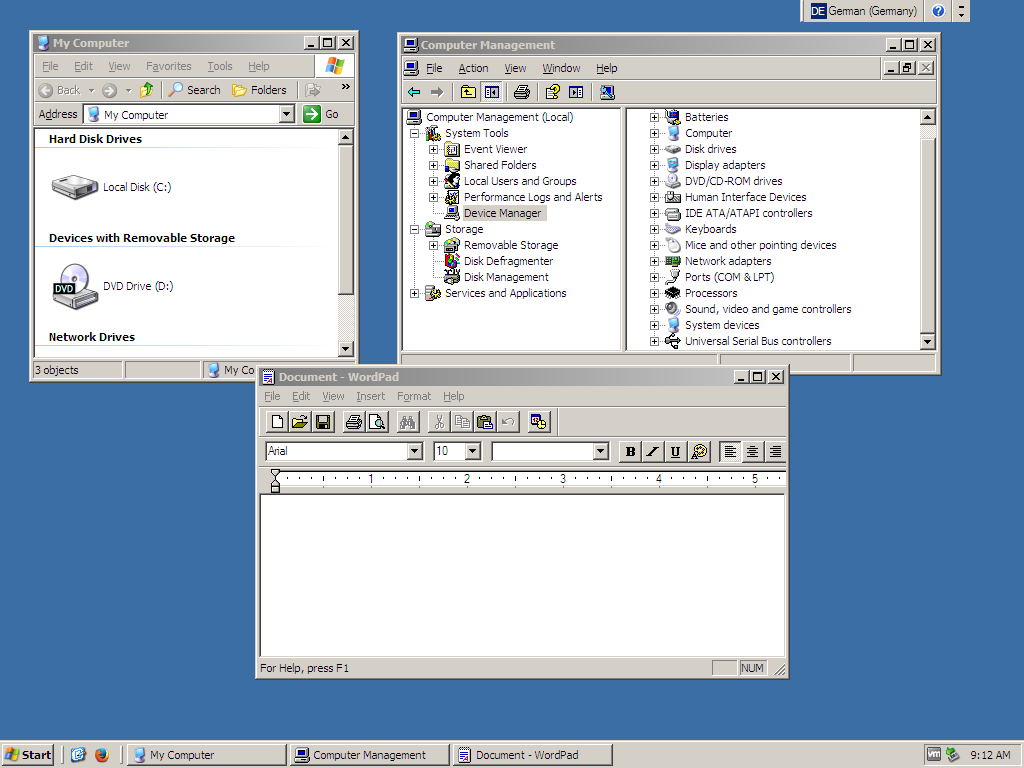
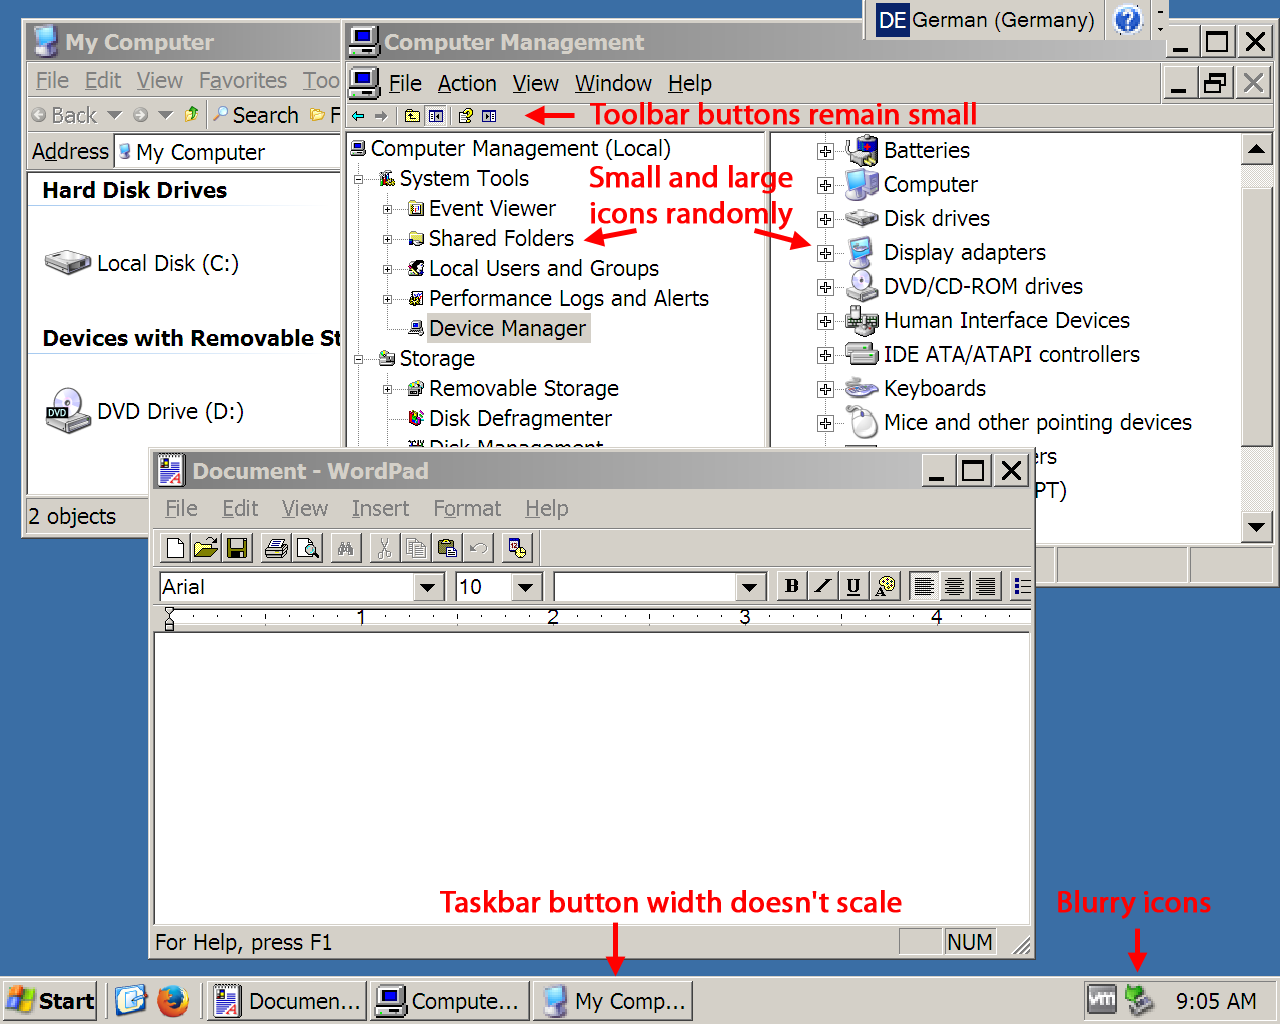
Fonts are nicely upscaled here, but everything else is a gamble. A few graphics are properly replaced by their high-resolution counterparts, some are blurrily resized, and even more just remain small. Especially toolbars often retain their small size, giving users a hard time to click any button. Some elements (like Explorer’s taskbar button width) also use absolute pixel sizes and don’t scale at all. When the inner font gets bigger, text is simply cut off.
Fast-forward to the mid-2000s. IBM is selling the very first HiDPI screen with a pixel size of just 125 µm while companies like Apple and Dell release the first 30-inch computer monitors, getting many people to increase their viewing distance. Developments like this require Microsoft to finally take DPI scaling seriously in Windows.
Although WordPad above shows that applications could be properly scaled using the techniques of that time, Microsoft decided for the nuclear option in Windows Vista. All existing applications were deemed incapable of proper DPI scaling and new applications could declare being “DPI aware”. If they don’t do that, Windows’ newly introduced DPI Virtualization takes place: Applications are rendered with 96 DPI internally and then upscaled to the configured DPI setting. If you suspect that this comes with a quality loss, you are damn right:
Looking closely, you see that not only the icons look blurry, but also the upscaled text. On the plus side, fonts and graphics are resized by the same factor, so no GUI element looks out of place. However, blurry text and unsharp graphics is quite the opposite of what you want when getting the latest HiDPI display.
By the way, the screenshot above is not from some ancient Windows version or third-party application, but from latest Windows 10. Ironically, Microsoft did a bit better between Windows Vista and Windows 8 when it only enabled DPI Virtualization beyond 120 DPI and scaled like Windows XP below that. But non-proportional scaling was apparently a bigger problem than blurry scaling, so DPI Virtualization became the default for all settings over 96 DPI in Windows 8.1.
It should be noted however that Microsoft didn’t stop at this point and added many useful improvements over the time:
Windows 8.1 introduced different DPI settings per monitor.
Since then, two monitors with vastly different pixel sizes no longer had to decide on a common DPI value, but could each run with their optimal setting. Additionally, applications moved between both monitors are automatically rerendered (except for the title bar).Windows 10 Version 1607 added some useful APIs and introduced DPI scaling of an application’s non-client area (title bar), provided that the application indicates support for that.
Windows 10 Version 1703 added automatic scaling for a few more GUI elements and introduced “GDI Scaling”, an alternative hack to render legacy applications on HiDPI screens.
GDI Scaling is much like DPI Virtualization, except that fonts are upscaled before rendering, resulting in mostly sharp text. Applications can easily be made DPI-aware this way, but their graphics will still look blurry, and the nonstandard rendering of text may also cause a few subtle glitches.
As you see, the DPI Virtualization and GDI Scaling hacks are doing an okay job for legacy applications. But new applications in 2020 should be made properly DPI-aware right from the start. The next few sections will show you how to do that using the Win32 API. As an example, we are going to write a wizard-style application.
Anatomy of the wizard
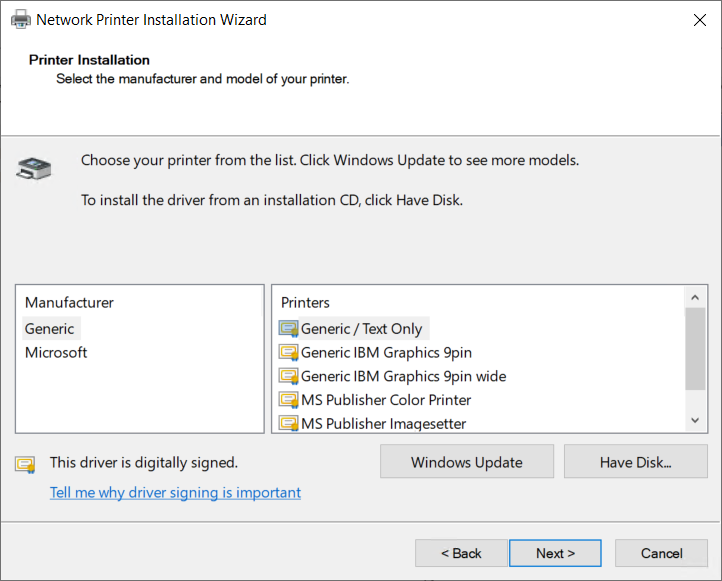
Wizard-style user interfaces are very common for installers and generally every complex job that is better broken down into individual steps. The still dominant wizard style features a white header with a bold title and subtitle, an optional logo, and the omnipresent Back, Next, and Cancel buttons in the lower right corner. The remaining space in-between is called the page and fully defined by the developer. Microsoft has defined this style as Wizard97 and provides an API for it in every Windows release since Windows 98. It has therefore seen wide adoption even outside of Microsoft applications, as you can see here:
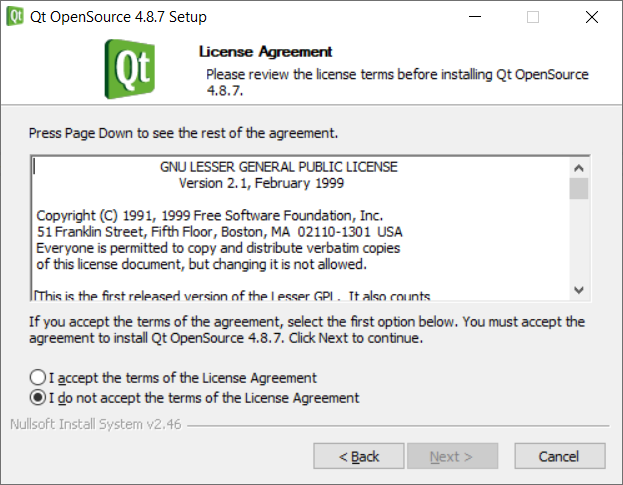

Basically every Windows and non-Windows user has clicked through such a setup at least once and should know this wizard by heart. However for users of HiDPI displays, it combines the worst of all worlds: No DPI awareness, graphics with fixed pixel sizes, and a window that is not even resizable.
Looks like an ideal target that bitterly needs to be made DPI-aware!
Introducing Wizard-2020
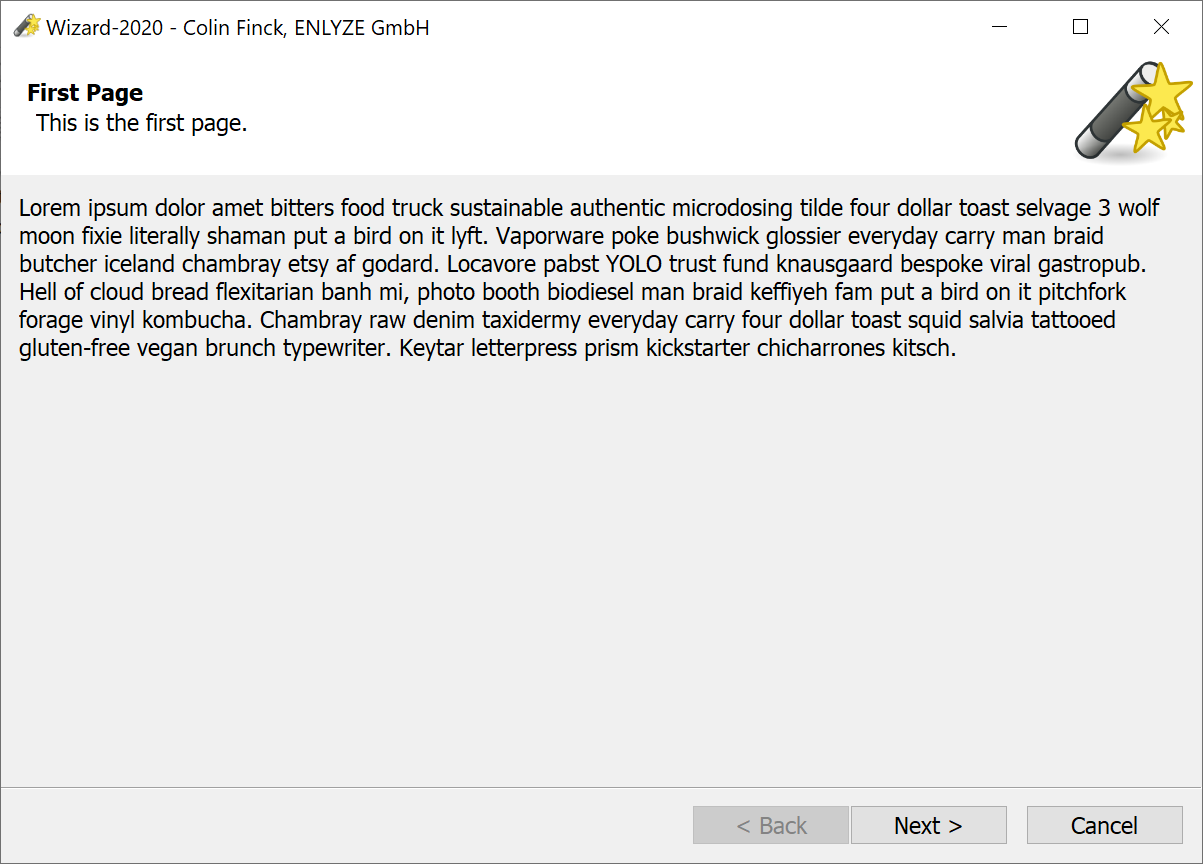
https://github.com/enlyze/Wizard-2020
All ideas presented in this blog series have been implemented into a DPI-aware resizable wizard application. It’s an extensible Visual Studio 2017 project released under MIT license. Going with Microsoft’s naming scheme, I’m calling it Wizard-2020.
Feel free to use it as the basis for your next wizard application. Let’s eliminate all blurry wizards once and for all!
Declaring DPI awareness
Developing any Win32 application for the fancy world of HiDPI displays begins by officially declaring its DPI awareness. This is achieved through a manifest file embedded into the resource section of your application. You should already know these XML-formatted files from enabling visual styles or requesting privilege elevation, so I can skip the basics here.
In order to declare full DPI awareness and enable all available operating system features, put the following lines into a manifest file:
<?xml version="1.0" encoding="UTF-8" standalone="yes"?>
<assembly manifestVersion="1.0" xmlns="urn:schemas-microsoft-com:asm.v1" xmlns:asmv3="urn:schemas-microsoft-com:asm.v3">
  <asmv3:application>
    <asmv3:windowsSettings>
      <dpiAware xmlns="http://schemas.microsoft.com/SMI/2005/WindowsSettings">True/PM</dpiAware>
      <dpiAwareness xmlns="http://schemas.microsoft.com/SMI/2016/WindowsSettings">PerMonitorV2, PerMonitor</dpiAwareness>
    </asmv3:windowsSettings>
  </asmv3:application>
</assembly>
This covers all DPI features up to Windows 10 Version 1703. The user will especially notice that all elements of your application (including the title bar) properly rescale when being moved between screens of different DPI settings. I wish that was already a common thing, but unfortunately it’s not.
You can just add that file with a .manifest extension to your Visual Studio project and its Manifest Tool will pick it up during the build process. Note that Visual Studio also provides DPI awareness settings in the Manifest Tool -> Input and Output section of the Project Properties. However, as of Visual Studio 2017, these settings don’t cover the latest features introduced in Windows 10 Version 1703. So better leave them untouched and just go for the manifest file approach.
Scaling GUI elements
Now that you have declared DPI awareness for your application, it’s time to actually write DPI-aware code. My approach to that is pretty straightforward:
- Create a GUI that looks perfect at 96 DPI.
- Add code to dynamically scale all fixed pixel sizes by Current DPI/96 DPI.
- PROFIT!!!
How do we actually get to know the current DPI setting?
For years, calling the GetDeviceCaps API with the LOGPIXELSX parameter was the way to go here.
This still works fine, but only returns the DPI setting of the primary monitor.
Not really what we want given that our application could be running on a second monitor with different DPI settings.
As the first operating system with per-monitor DPI support, Windows 8.1 also provides the required GetDpiForMonitor API.
Together with the MonitorFromWindow function, we can use it to retrieve the actual DPI setting of the monitor our application window is running on.
Windows 10 Version 1607 merges these steps into one through its added GetDpiForWindow API.
But other than returning the same information in just one function call, it has no advantages.
The typical Win32 developer now needs a function that does the right thing on modern Windows versions with per-monitor DPI support while preserving compatibility with earlier ones. Here is my take on that:
typedef HRESULT (WINAPI *PGetDpiForMonitor)(HMONITOR hmonitor, int dpiType, UINT* dpiX, UINT* dpiY);

WORD
GetWindowDPI(HWND hWnd)
{
    // Try to get the DPI setting for the monitor where the given window is located.
    // This API is Windows 8.1+.
    HMODULE hShcore = LoadLibraryW(L"shcore");
    if (hShcore)
    {
        PGetDpiForMonitor pGetDpiForMonitor =
            reinterpret_cast<PGetDpiForMonitor>(GetProcAddress(hShcore, "GetDpiForMonitor"));
        if (pGetDpiForMonitor)
        {
            HMONITOR hMonitor = MonitorFromWindow(hWnd, MONITOR_DEFAULTTOPRIMARY);
            UINT uiDpiX;
            UINT uiDpiY;
            HRESULT hr = pGetDpiForMonitor(hMonitor, 0, &uiDpiX, &uiDpiY);
            if (SUCCEEDED(hr))
            {
                return static_cast<WORD>(uiDpiX);
            }
        }
    }

    // We couldn't get the window's DPI above, so get the DPI of the primary monitor
    // using an API that is available in all Windows versions.
    HDC hScreenDC = GetDC(0);
    int iDpiX = GetDeviceCaps(hScreenDC, LOGPIXELSX);
    ReleaseDC(0, hScreenDC);

    return static_cast<WORD>(iDpiX);
}
Call this from your WM_CREATE handler before creating any GUI elements and save the returned value in a member variable (e.g. m_wCurrentDPI).
Then use it in your WM_SIZE handler to scale your fixed pixel sizes.
For a button in my Wizard-2020, this looks like:
int iButtonHeight = MulDiv(23, m_wCurrentDPI, iWindowsReferenceDPI);iWindowsReferenceDPI is an int constant I have defined to 96.
Microsoft also provides this constant under the name USER_DEFAULT_SCREEN_DPI in the Windows headers, but only for applications targeting Windows Vista or later.
This approach works very well for basically all GUI elements except for …
Scaling fonts
A notable exception to the formula above are fonts. Fonts in Windows GUIs are usually sized in points instead of pixels. Scaling them DPI-aware requires implementing the formula I introduced initially in this blog post.
Taking Wizard-2020 as an example again, the 10-point main GUI font is calculated like:
m_lfGuiFont.lfHeight = -MulDiv(10, m_wCurrentDPI, iFontReferenceDPI);The constant iFontReferenceDPI is defined to 72.
The negated value is required for all APIs of the CreateFont family to denote a character height (what we usually understand as font size) in contrast to a cell height.
Reacting to DPI changes
Finally, we want our application to properly react to DPI changes. This may happen when the user moves the application to another monitor, removes the laptop from the docking station, or just manually changes DPI settings in Windows.
As we have declared full DPI awareness in the first step, Windows will inform us about any DPI changes by sending a WM_DPICHANGED message to the window procedure of our main window.
Depending on your installed WDK and targeted Windows version, you may not have this message in your header.
This can be easily solved though:
#if !defined(WM_DPICHANGED)
#define WM_DPICHANGED 0x02E0
#endif
The message handler for WM_DPICHANGED then needs to do a few things based on the complexity of your application.
However, this usually boils down to:
Updating the
m_wCurrentDPIvariable used for all further size calculations. You can be sure that the DPI reported byWM_DPICHANGEDis always the latest DPI setting.Deciding which parts of your window need to be redrawn now that the DPI setting has changed. This is usually the entire window.
Updating the size of every used font. As the Win32 font handling is very tedious, this involves recalculating the size, creating a new font, updating all controls using it, and deleting the old font.
Notifying certain child windows about the DPI change.
Finally adjusting the window size to the new (DPI-adjusted) size suggested by Windows.
An excerpt from the Wizard-2020 example shows how this may look like in code:
LRESULT
CMainWindow::_OnDpiChanged(WPARAM wParam, LPARAM lParam)
{
    m_wCurrentDPI = LOWORD(wParam);

    // Redraw the entire window on every DPI change.
    RECT rcWindow;
    GetClientRect(m_hWnd, &rcWindow);
    InvalidateRect(m_hWnd, &rcWindow, FALSE);

    // Recalculate the main GUI font.
    m_lfGuiFont.lfHeight = -MulDiv(10, m_wCurrentDPI, iFontReferenceDPI);
    m_hGuiFont = make_unique_font(CreateFontIndirectW(&m_lfGuiFont));

    // Update the control fonts.
    SendMessageW(m_hBack, WM_SETFONT, reinterpret_cast<WPARAM>(m_hGuiFont.get()), MAKELPARAM(TRUE, 0));
    SendMessageW(m_hNext, WM_SETFONT, reinterpret_cast<WPARAM>(m_hGuiFont.get()), MAKELPARAM(TRUE, 0));
    SendMessageW(m_hCancel, WM_SETFONT, reinterpret_cast<WPARAM>(m_hGuiFont.get()), MAKELPARAM(TRUE, 0));

    // Update the DPI for our custom child windows.
    m_pFirstPage->UpdateDPI();
    m_pSecondPage->UpdateDPI();

    // Use the suggested new window size.
    RECT* const prcNewWindow = reinterpret_cast<RECT*>(lParam);
    int iWindowX = prcNewWindow->left;
    int iWindowY = prcNewWindow->top;
    int iWindowWidth = prcNewWindow->right - prcNewWindow->left;
    int iWindowHeight = prcNewWindow->bottom - prcNewWindow->top;
    SetWindowPos(m_hWnd, nullptr, iWindowX, iWindowY, iWindowWidth, iWindowHeight, SWP_NOZORDER | SWP_NOACTIVATE);

    return 0;
}
Fixing your graphics
Forget about old-school Windows bitmap files when adding graphics to your application. Even if you manage to reduce them to a custom palette and use the only supported RLE compression, they will still be larger (and probably look worse) than the same image stored as a PNG. As we don’t target anything older than Windows XP here, we can safely assume that the GDI+ library is available, which natively supports PNGs for all our graphics needs.
Unfortunately, Win32 application resources were invented before PNGs were a thing. This is why there is no standardized resource category for PNG files and neither an API to load a PNG resource. Well, solving the former problem is as simple as inventing our own category in the .rc file:
IDP_LOGO PNG "res\\logo.png"For the latter problem, we need to write our own function to load a PNG resource. As the low-level APIs for application resources haven’t really changed since 16-bit Windows times, this task can easily get cumbersome. Anyway, I got you covered and the following code will load a PNG resource and directly output it as a GDI+ object guarded by a smart pointer:
std::unique_ptr<Gdiplus::Bitmap>
LoadPNGAsGdiplusBitmap(HINSTANCE hInstance, UINT uID)
{
    HRSRC hFindResource = FindResourceW(hInstance, MAKEINTRESOURCEW(uID), L"PNG");
    if (hFindResource == nullptr)
    {
        return nullptr;
    }

    DWORD dwSize = SizeofResource(hInstance, hFindResource);
    if (dwSize == 0)
    {
        return nullptr;
    }

    HGLOBAL hLoadResource = LoadResource(hInstance, hFindResource);
    if (hLoadResource == nullptr)
    {
        return nullptr;
    }

    const void* pResource = LockResource(hLoadResource);
    if (!pResource)
    {
        return nullptr;
    }

    std::unique_ptr<Gdiplus::Bitmap> pBitmap;
    HGLOBAL hBuffer = GlobalAlloc(GMEM_MOVEABLE, dwSize);
    if (hBuffer)
    {
        void* pBuffer = GlobalLock(hBuffer);
        if (pBuffer)
        {
            CopyMemory(pBuffer, pResource, dwSize);

            IStream* pStream;
            if (CreateStreamOnHGlobal(pBuffer, FALSE, &pStream) == S_OK)
            {
                pBitmap.reset(Gdiplus::Bitmap::FromStream(pStream));
                pStream->Release();
            }

            GlobalUnlock(pBuffer);
        }

        GlobalFree(hBuffer);
    }

    return pBitmap;
}
Finally, you can just draw the loaded image onto any Device Context like this:
Gdiplus::Graphics g(hDC);
g.DrawImage(m_pLogoBitmap.get(), x, y, width, height);
Note that you most likely need to resize your image based on the screen’s DPI setting. Microsoft recommends creating multiple images for each DPI setting, but I found this overkill for most situations. Most of the times, it’s easier and sufficient to have one high-resolution image and then let GDI+ resize it as needed. Resizing is cheap these days, and your user interface will still feel snappy.
Conclusion
That’s it, all secrets of creating a DPI-aware Win32 application using modern C++ are now in your hands! Following these basic principles, you should be able to make your new application scalable right from the beginning or fix any existing one. Blurry windows on state-of-the-art computer screens should finally become a thing of the past! The techniques presented in my blog series will also guard you from the most common resource leaks when dealing with Win32 or any legacy C API.
It should be noted though that a few additional concepts on top can never turn C++ into a fundamentally safe programming language like Rust. Depending on where the native-windows-gui crate and Microsoft’s Rust experiments go, we may soon be able to write native Windows applications entirely in Rust. But that’s stuff for 2021 or even later ;)
Colin Finck is working as a Software Engineer at ENLYZE. He has been digging into Windows internals for over a decade as a core member of the ReactOS Project.